|
Crafts for Moms: Beautiful Boxwood Wreath
|  |
|
| Make Your Own Holiday Wreath!
|
|
|
|
|
|
|
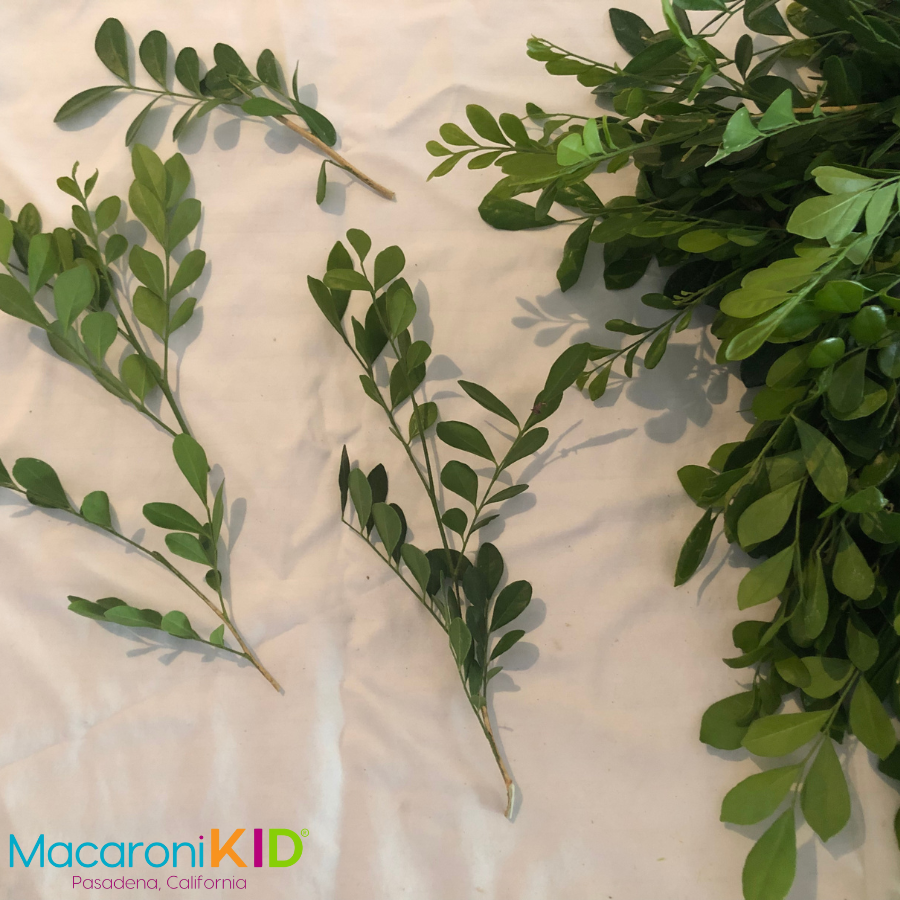
| This wreath can be made with whatever branches you have available: rosemary, holly, bay leaf, lemon leaf… and in springtime lavender is amazing! If you don’t have any of these (or neighbors willing to let you trim their hedge), ask at the Christmas tree lot when you purchase your tree if they’ll let you gather up some trimmings that have already been removed from their trees.
Despite the detailed instructions below, assembling this wreath only takes about 30 minutes. |
|
|
|
|
|
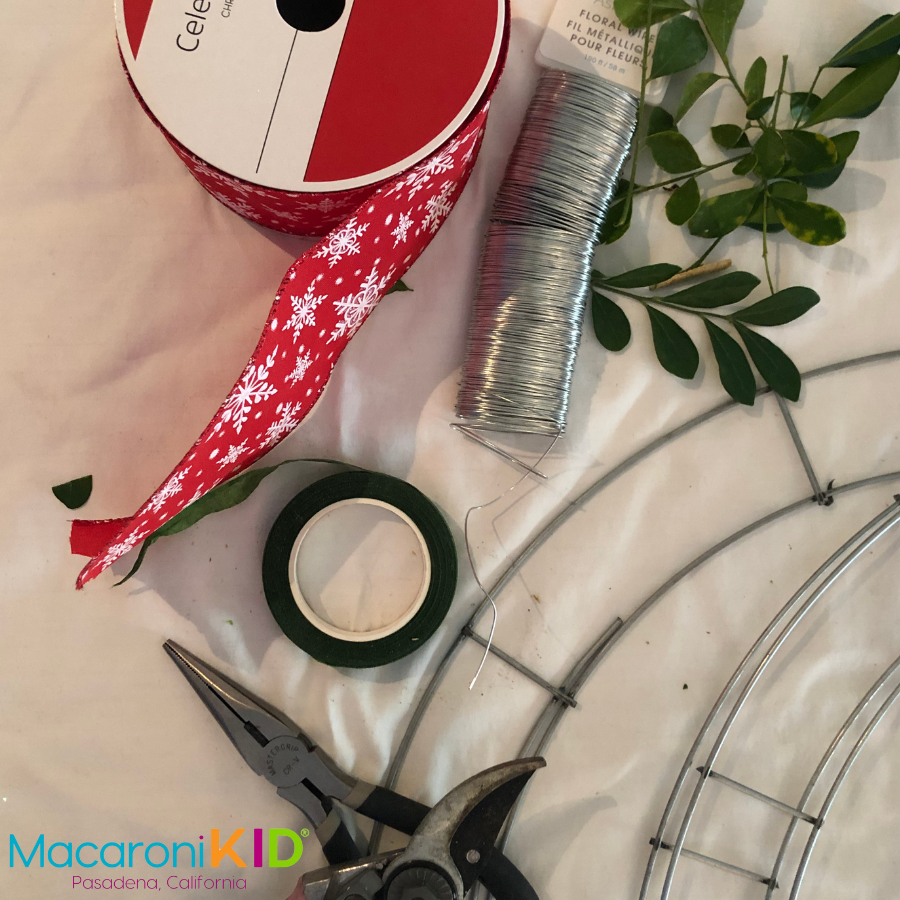
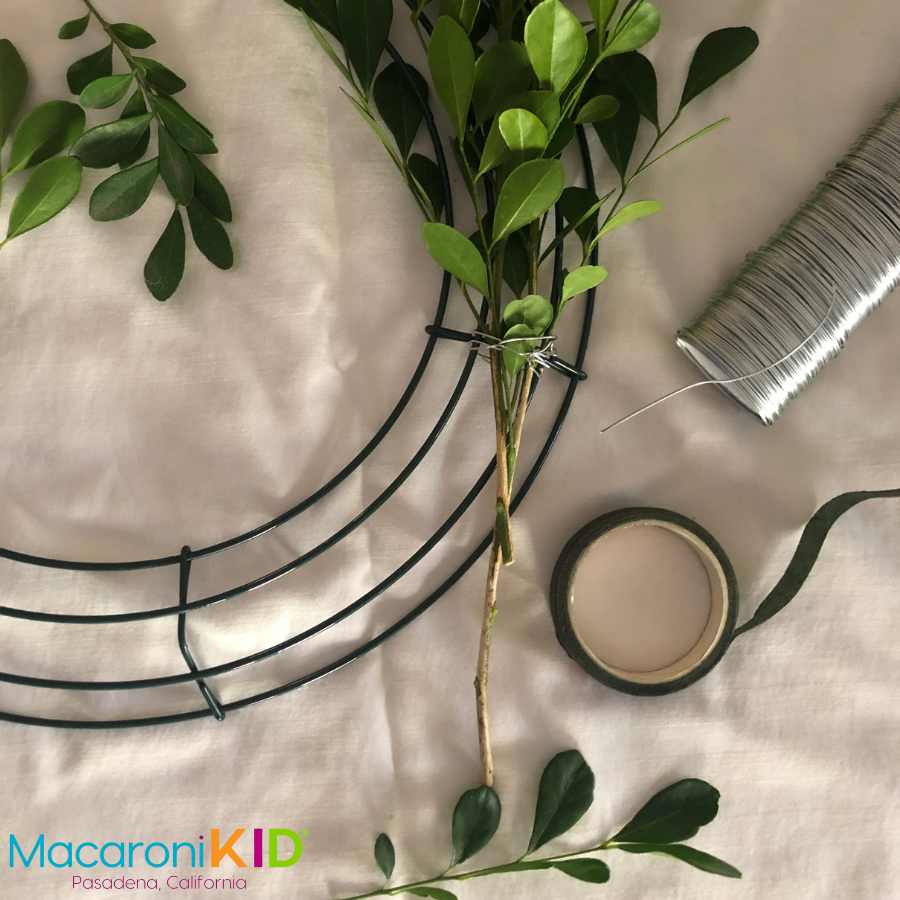
| Supplies Needed:
|
|
|
|
- a wreath frame
- a large armload of branches
- gardening shears
- wire
- pliers with a side cutter
- floral tape
- wide holiday ribbon
- scissors
|  |
|
|
Gathering Your Supplies:
|
|
|
| - Wreath frames are sturdy wire rings, often made of multiple strands welded together. They can be found at craft stores and are also available in solid Styrofoam or MDF wood.
- Any type of craft or utility wire will work, as long as it’s not too stiff to bend or too thick to easily snip with pliers (coat hanger wire is too thick for this)
- Floral tape is a stretchy, papery tape that’s not very sticky and typically dark green. It’s found at craft stores near the faux flowers.
- Wide, festive, wired craft ribbon is best for this project, but truly any ribbon will do. For the right scale, you’ll want it to be at least 1.5 in wide, and you’ll need 10 feet or more.
|
|
|
|
|
|
| Trimming Your Branches:
|
|
|
| 1. Branches should be about the same length as your size wreath frame. For a 12” wire frame, cut your branches long enough that they can be trimmed to 12 to 14 inches. If you are working indoors, give your branches a good, hearty shake before bringing them in, to reduce the chance of bringing in any insects with them.
|
|
| 2. Sort through and trim your branches. Save those with the prettiest tips for the second pass around, and trim the thicker, fuller ones to roughly equal length, with about 1 to 3 in of naked stem at the bottom. Also save the sub-branches you trim off the bottoms of those, as you’ll need them for the third pass.
| 
|
|
| Assembling Your Wreath:
|
|
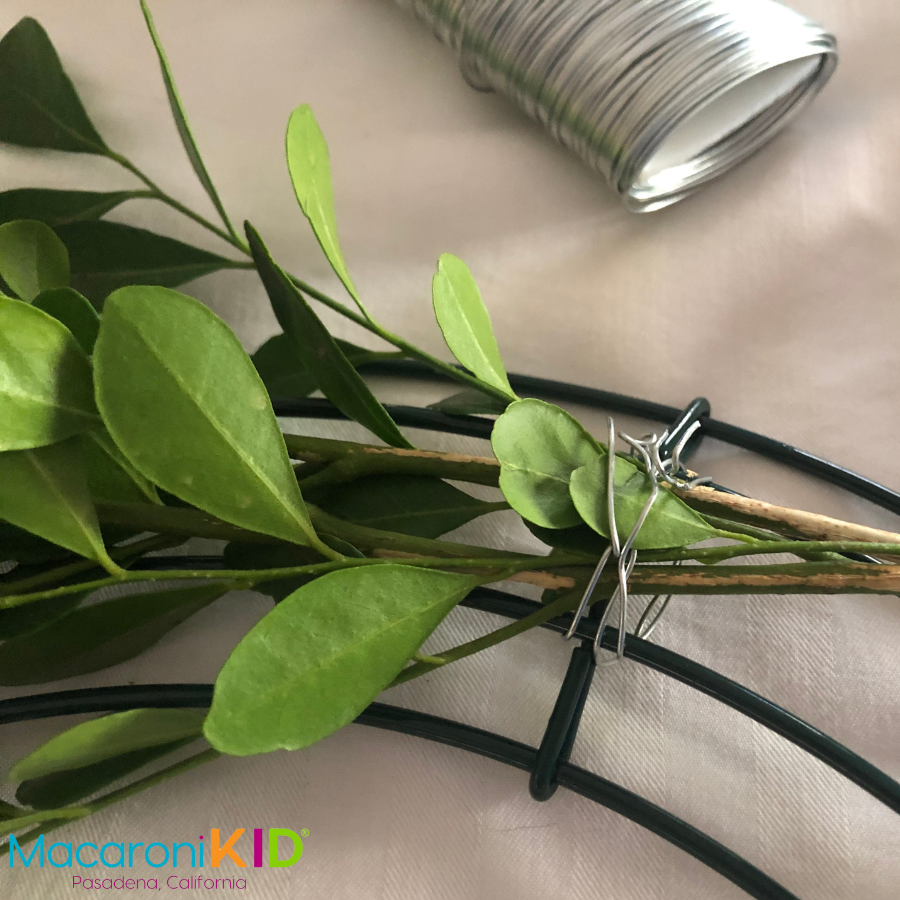
| 1. This is done in 3 passes around the frame. First, wrap a 5 – 6 in piece of wire around the wreath frame at the place you’d like to start, and secure 2 or 3 of your larger trimmed branches to it, near the bottom of the greenery. Use pliers to wrap the wire ends around themselves, tightening the cluster of branches down to the frame. Push the woody stems through to the back of the frame.
| 
|
|
| 2. Secure a second cluster of 2 to 4 branches several inches below the first. Working in the direction of the stem ends, go around the frame, attaching a cluster of branches every 2 or 3 inches. It might take 10 or 12 clusters for a 12-inch wreath. If you are right-handed, you’ll probably be working in a counterclockwise direction, covering the ends of the previous stems with each new cluster of branches added.
| 
|
|
| 3. On the last addition of large branches, you’ll need to lift the first cluster to secure the last cluster. Once you've completed your first pass around the wreath, carefully, turn the wreath over and place back down. Using your gardening shears, snip off any extra woody stems leaving a 1in tail on each. If you leave the stems too long, they may be visible or scratch your door. If you cut them too short, the branches will become loose and fall out of the wreath. Even if you tighten the wire securely, the wreath will be rather loose at this point, so try not to lift or move it more than necessary. Don’t worry, the second pass will tighten everything up.
| 
|
|
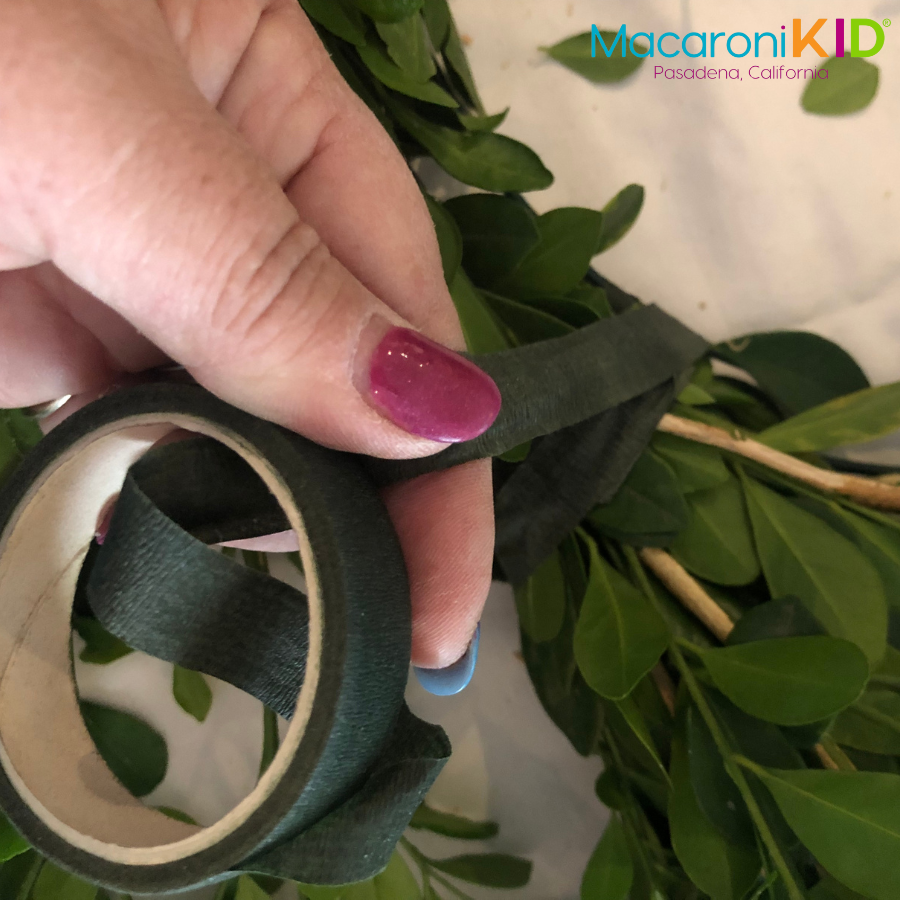
| 4. For your second pass, trim the prettiest branches to a couple inches shorter than your larger stems. Wrap the end of your floral tape around the wreath at your starting point, being sure to wrap it over itself and pull tight. The floral wrap should stick to itself. Then add 1 or 2 of your medium sized branches and wrap the floral tape, adding a couple branches every few inches as you go, and working in the stem direction. Leave the floral tape on the roll and wrap in the same direction (inside to outside) each time you add a branch. Each addition should cover spots where the wreath frame, wire, or last wrap of floral tape is visible.
|
|
| |
|
| 5. Secure the end of the floral tape by passing the end under itself, and pulling tight. You might use a small piece of wire over the top of the floral tape to be sure it's secure. Then cover the wire and floral tape with more greenery.
|
|
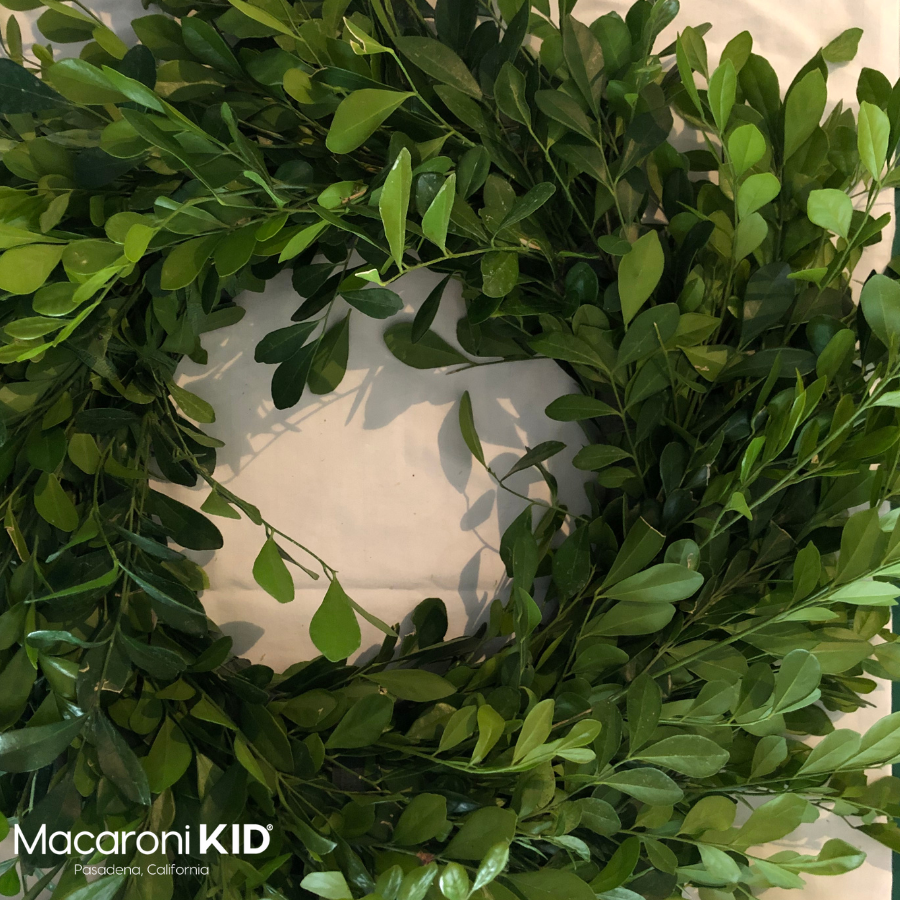
| 6. For your third pass, use the left-over trimmings from the larger branches, snipping the ends to make them each about 7 or 8 inches long. Tuck 1 or 2 at a time into the floral tape that your wrapped in the second pass. Keep going in the same direction, adding the small branches until none of the floral tape (or wire) is visible.
|
|
|
|
|
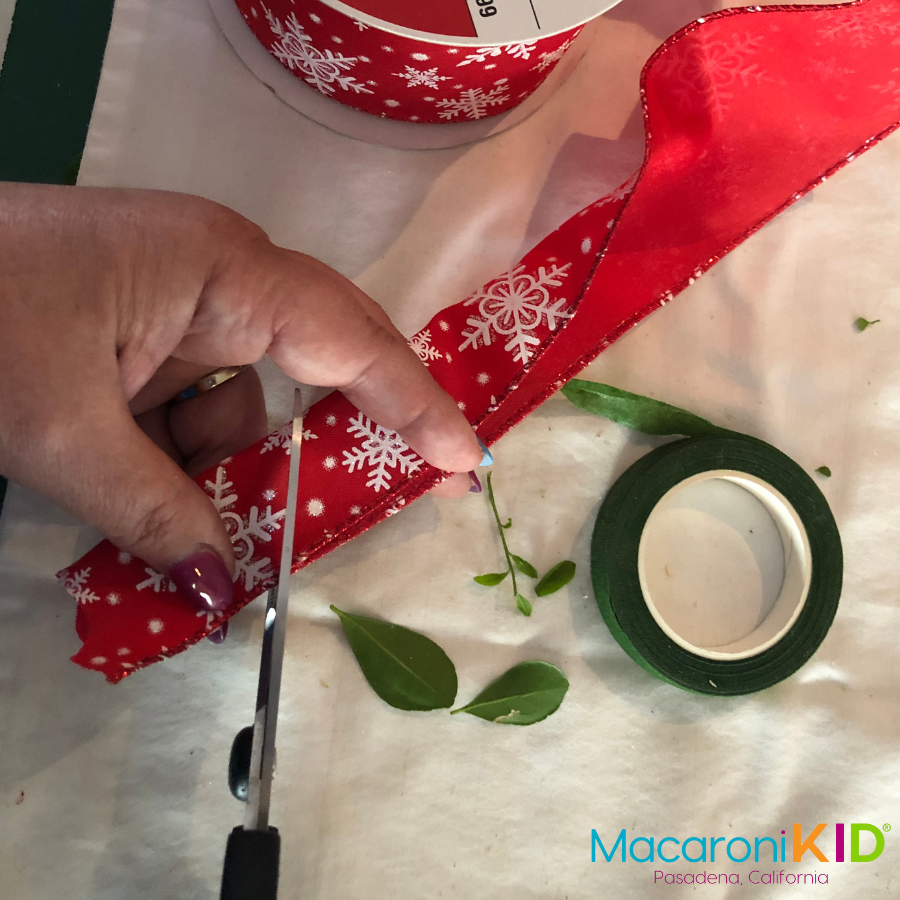
| Making the Bow:
|
|
| 1. For the bow, cut two lengths of ribbon, each about 5 feet long. Find the least pretty spot on the wreath and tie the first piece of ribbon around it, securing with a knot. This should leave you 2 long tails, each over 2 ft in length. Tie the second strip of ribbon over the first, leaving you with 4 tails.
| 
|
|
| 2. With the first 2 tails, tie a traditional bow, with slightly longer than usual loops. Then, using the second two tails, tie a second traditional bow right on top of the first. Adjust the loops into 4 nice round, fluffy curves so it looks like a large 4-loop bow.
| 
|
|
| 3. Fold each of the 4 tail ends in half lengthwise and sip the end diagonally starting at the outside and cutting downward to the fold. This will give the ends a finished, inverted-v tip. Crinkle the wire in the ribbon to give the tails a fluffy, pretty bend.
| 
|
|
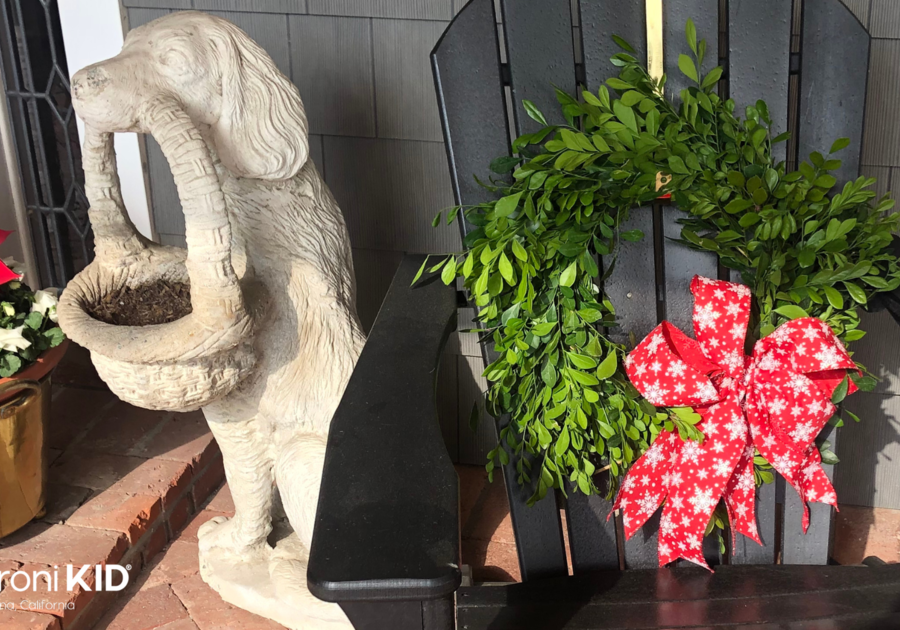
| Finally, hang your wreath and enjoy! It should last several weeks if kept out of direct sunlight.
|
|