| World Reef Awareness Day is June 1st, so it’s a great time to include a coral reef in a craft. Why not make this playset together with your kids? | |||
Supplies:
|
| ||
1. Ocean Scenery: Cut the flat cardboard to the size of the bottom of the box. Paint the cardboard blue, making swirls or wavy lines with the brush. Let partially dry. Cut the green foil paper into strips that resemble seaweed; this does not need to be precise. Tear the blue tissue paper into irregular shapes of various sizes. | 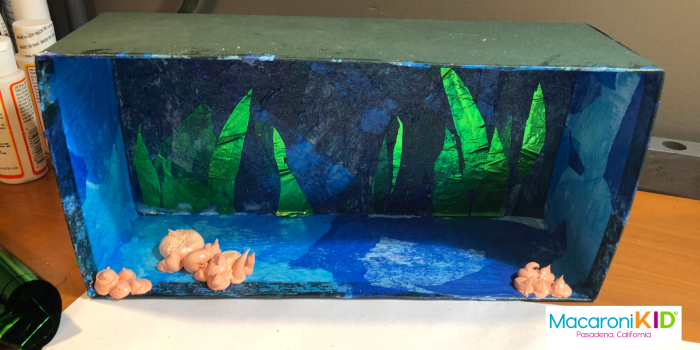 | ||
Add a layer of glue over the blue cardboard, using the brush to continue the organic, irregular texture. Place down a layer of the tissue paper while the glue is still wet, then another layer of glue. Add a few strands of “seaweed,” then more glue. Continue layering until you are satisfied with the ocean background. Be sure all of the tissue paper is covered with glue, and set the piece aside to dry. Complete the same layering process on the inside sides of the box: paint, glue, tissue, seaweed, glue, tissue, glue. Once both are dry, glue the cardboard piece inside the box at the bottom, and set the box up on its side like a diorama. | |||
2. Coral Reef: Cut the bottom off the tube of silicone caulking and empty it into a bowl. Add orange paint or mix together yellow with a little bit of red. Add about a ¼ cup or so of salt or sand and stir until color and texture are both fully incorporated. Spoon the mixture back into the tube and clamp the larger end closed with a binder clip. You should be able to squeeze the mixture out of the tube tip. | 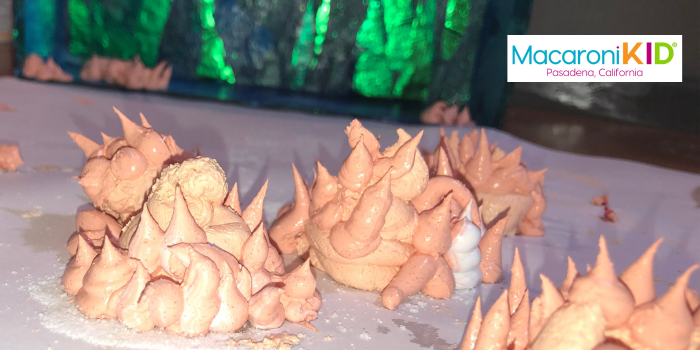 | ||
Alternatively, you can spoon the mixture into a disposable pastry bag, twist the end and snip off the tip. By either method, you are now ready to pipe the coral reef. You might want to build your reef clusters on a piece of scrap paper and transfer them to the box once set. This makes it easier to manipulate the tube or pastry bag without hitting the top of the box or having to work at an angle. As you pipe blobs of silicone, lift the tube straight upward and loosen your grip. Build small clusters of coral that are a few centimeters wide each. The bigger the coral clusters, the longer it will take for them to dry. Allow the silicone mixture to set, which will take a couple of hours. | |||
3. Sea Life: Using an awl, a grown-up can pierce a hole vertically through 2 or 3 plastic fish. String with fishing line, looping the end of the line around the fish and double knotting it at the top. | 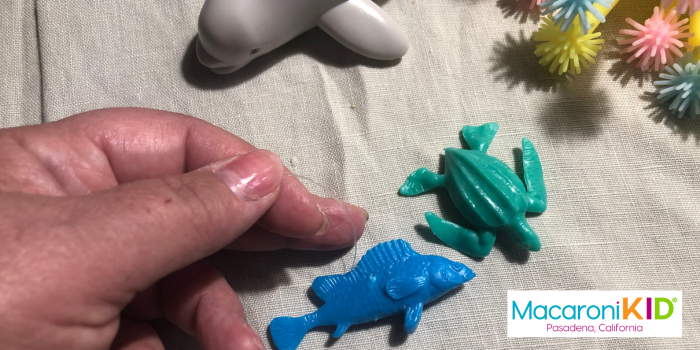 | ||
Pierce holes through the top of the box, and use the long fishing line tails to suspend the fish inside the ocean scene. Now add the semi-dried coral clusters, grouping them together to form a reef-like effect. Secure them with the remaining silicone mixture. Add a few small pebbles and any other elements you have, using extra silicone to secure them. | |||
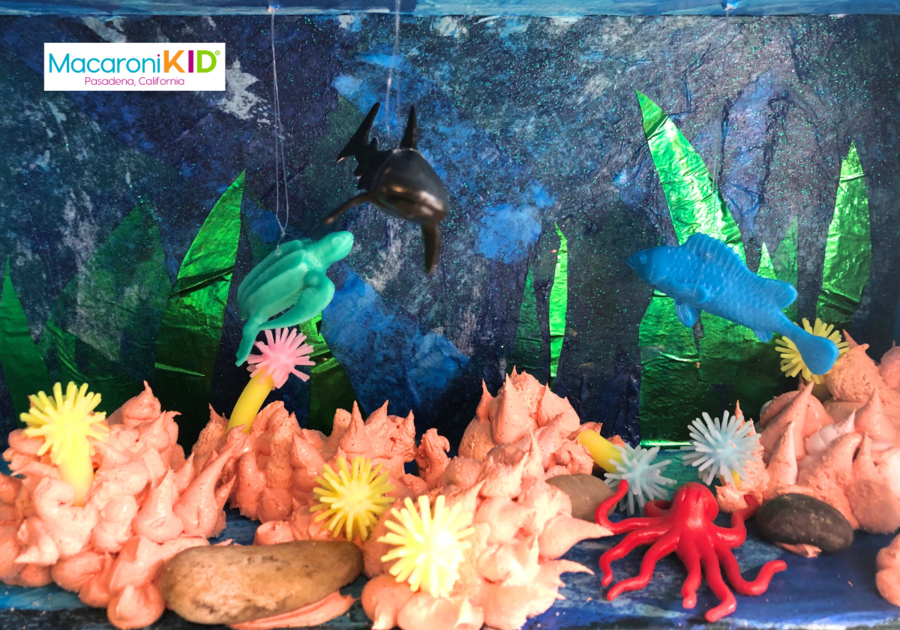
4. Your Coral Reef Playset The caulking that makes up the coral reef will fully cure in about 3 days. At that point you’ll no longer need to be gentle when touching the coral. Bring in whatever toys fit the scene: mermaids, turtles, divers, sharks and play to your heart’s content! | |||