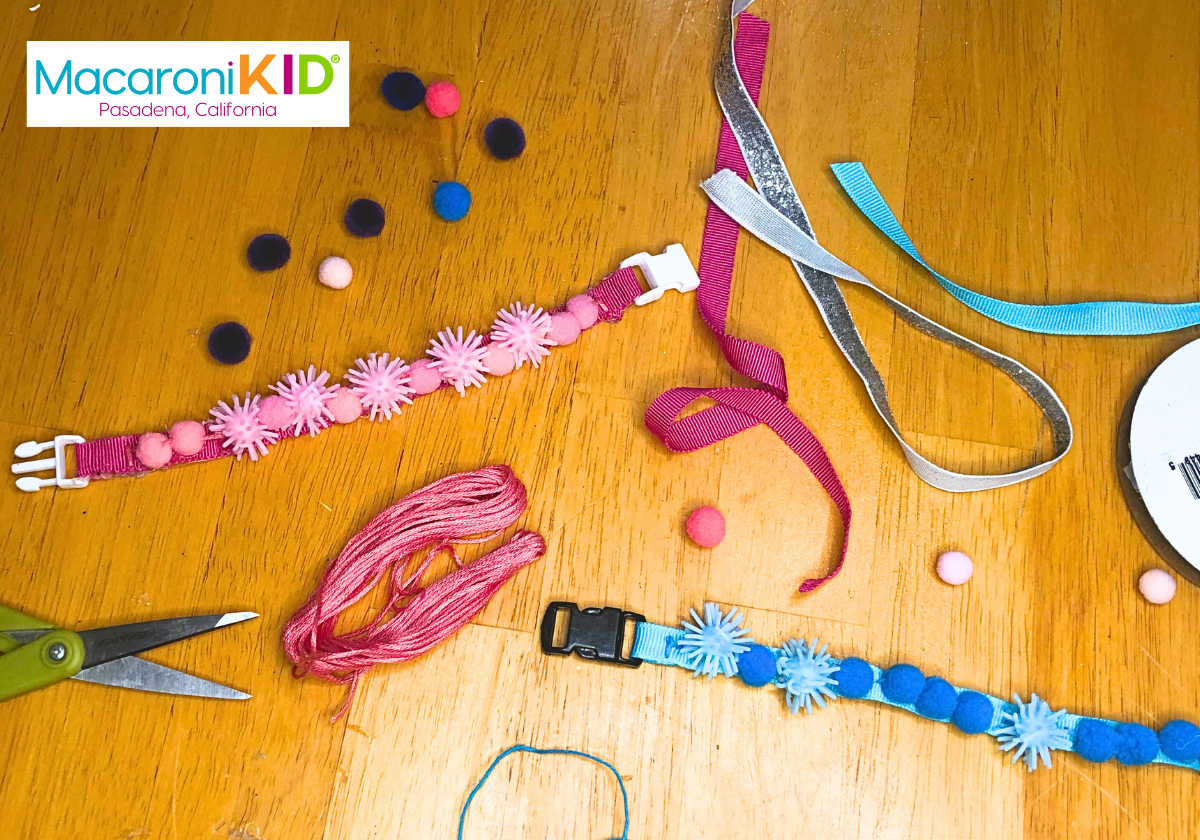
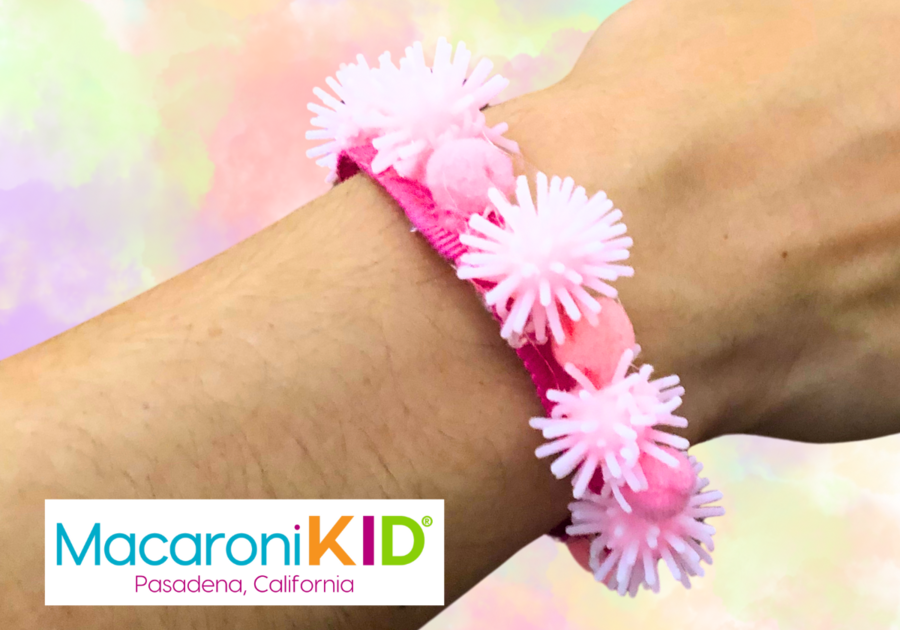
These cute friendship bracelets are totally unique! Be the first kid in your class or friend group to wear and trade them. | ||
Supplies:
| ||
 | ||
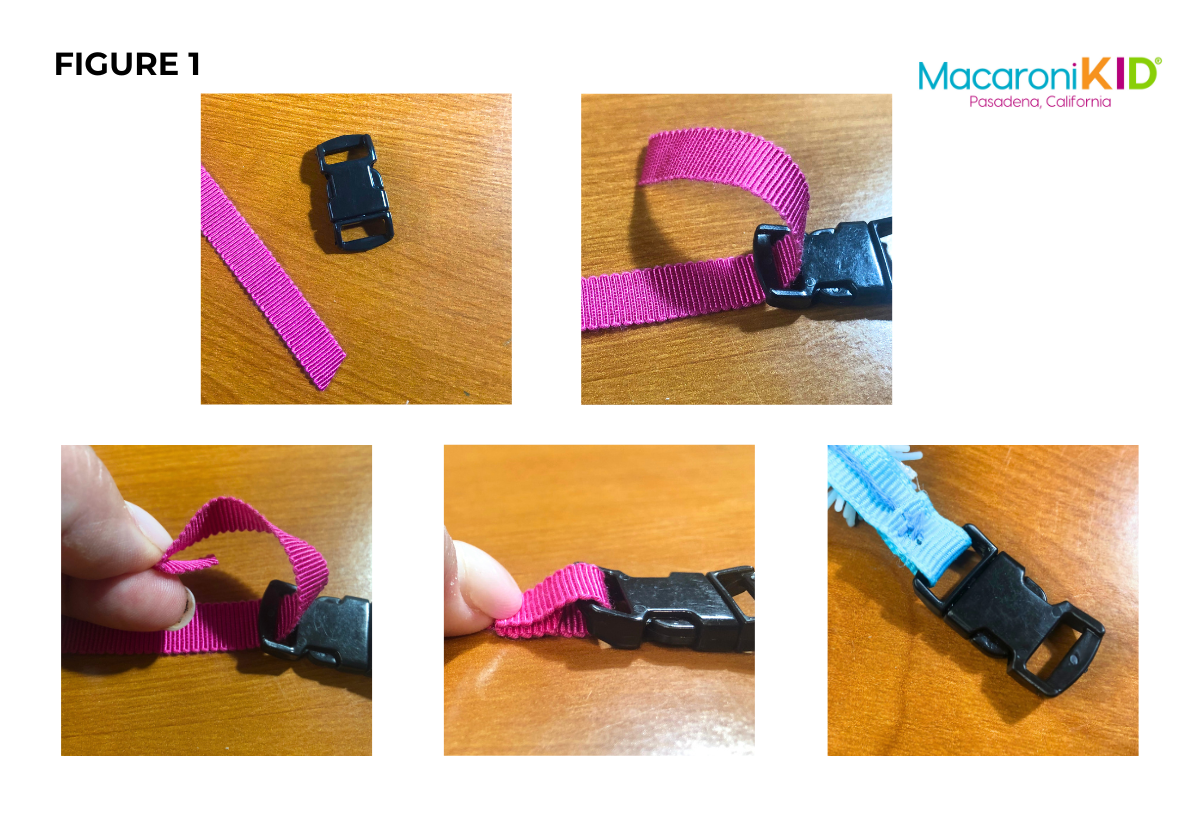
Instructions: 1. Cut a piece of ribbon about 2 or 3 inches longer than your wrist is around. 2. See Figure 1. Loop one end through the end of a side release buckle, folding the raw edge underneath itself, and stitch down. Don’t cut the thread after stitching it closed (you’ll continue stitching the pom-poms on with the same thread). Just do one end for now. 3. You can also hot glue the ribbon closed. Try to avoid allowing the plastic buckle to come in contact with the glue: just glue the ribbon to itself. Then, tie a knot in the end of your thread and start under the loop where the buckle is, piercing the ribbon with your needle and coming out from the loop, leaving the knot hidden within the fold. | ||
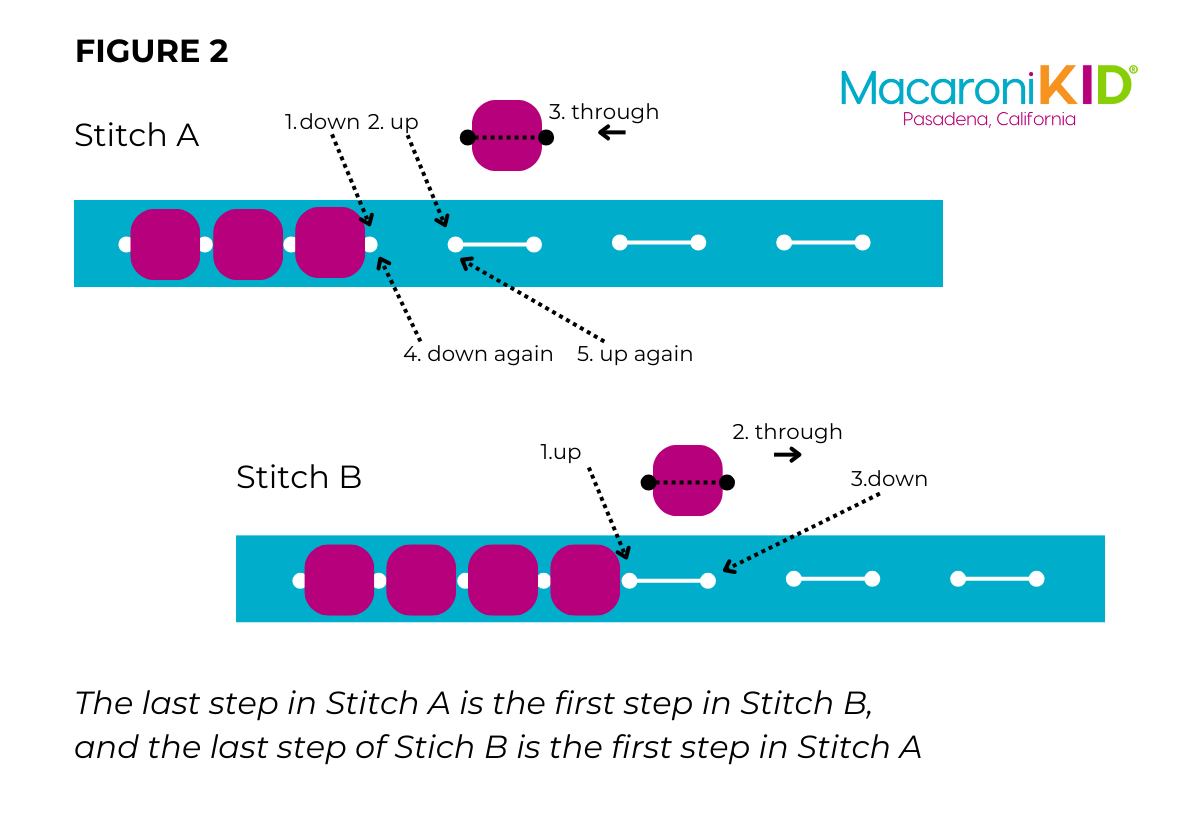
4. Lay out your pom-poms in a pattern you like. 5. To stitch the pom-poms on, follow the pattern in Figure 2. Stitching one pom-pom at a time, pierce the ribbon from top to bottom, make a single stitch about the length of the pom-pom, coming up through the ribbon, then through the pom-pom, then back down through the ribbon near the first hole. Come up through the ribbon again near the second hole, go through the second pom-pom, then stitch down about a pom-pom’s length along the ribbon. Repeat the stitch pattern, sewing your pom-poms along the length of the bracelet. Be sure to leave room at the end to secure the other half of the buckle. 6. If you are not confident in your stitching abilities, you can string all the pom-poms together onto your thread. Then hot glue each pom-pom to the top of the ribbon. Secure the thread through the ribbon at the other end before attaching the other half of the buckle. | ||
 | ||
7. Wrap the bracelet around your wrist to re-measure the length and be sure you have attached the right number of pom-poms for your size wrist. 8. Attach the other half of the buckle in the manner you attached the first half (figure 1). Loop the ribbon through the buckle, then use the same thread length you used to sew through the pom-poms to make a nice firm stitch through the folded ribbon end. Remove the needle from the thread and tie a knot as close to the ribbon as possible.Tuck the knot into the folded ribbon loop and secure it there with a dot of hot glue. 9. Make as many bracelets as you have colors and styles of pom-poms, mixing up the combinations to coordinate with different moods. Have Fun! | ||
 | ||


